Food Stylist Shares Top Tips for Virtual Dinner Parties
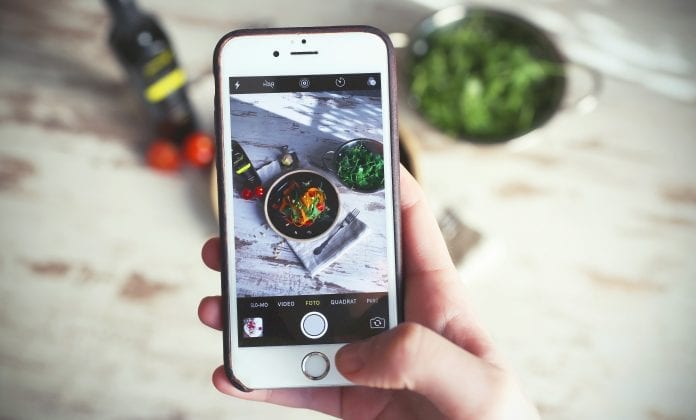
Ahead of the Table for 1 Million event, Gousto’s top food stylist Jenny Brown and senior recipe developer Jordan Moore have teamed up to share their do-it-yourself tricks to make your dishes look delicious on screen.
We’ve asked Jenny and Jordan to take the four mouth-watering Table for 1 Million official dinner party dishes and reveal how they would style each dish, ready for their video call close-up or Instagram snap!
Recipe box company Gousto is bringing the nation together for the UK’s biggest virtual dinner party this Friday 22nd May. Hosted by Nick Grimshaw with star guests Katherine Ryan, Paloma Faith and David Haye, the Table for 1 Million dinner party is available to everyone and free to attend.
On the night, the dream dinner guests will bring on heaps of laughter and entertainment, giving households the chance to ask questions through a chat feed, snap a photo and get involved with interactive polls.
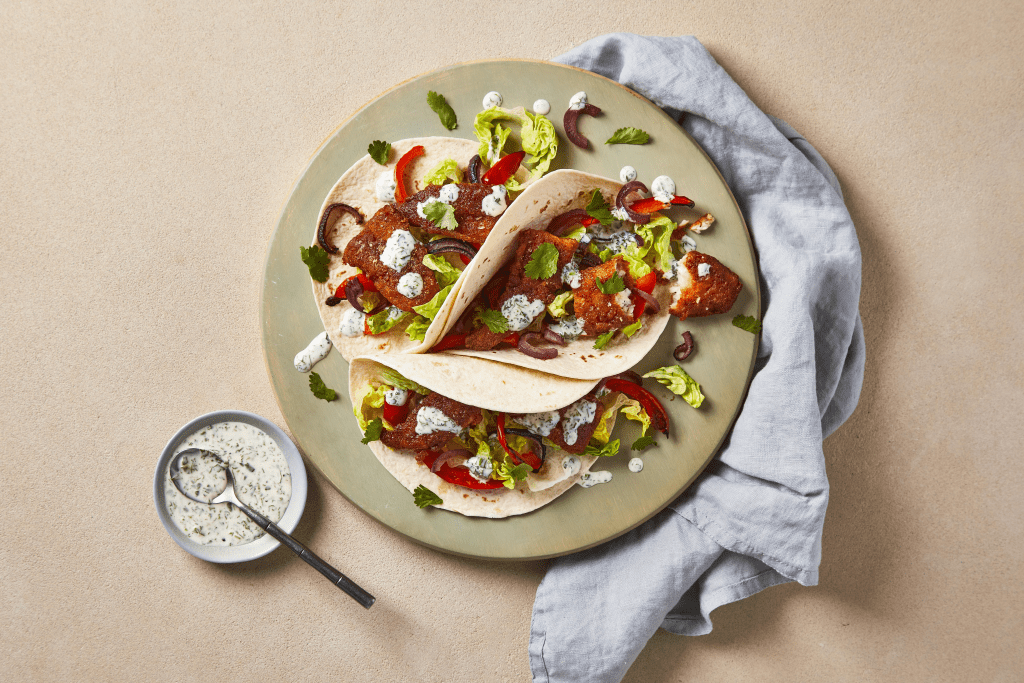
Baja-Style Fish Tacos With Coriander Mayo – Recipe
Whip up these super tasty Mexican inspired fish tacos, the perfect Friday night dinner! You’ll coat tender fish fillets in spices, and cook until golden and crisp. Wrap up the dish with warm tortillas, sweet roasted pepper and tangy coriander mayo!
You can easily make these Baja-style tacos vegan by switching the fish to tofu and swapping the mayo to vegan mayo. Simple and tasty!
Jordan’s Tip: “Before coating the fish pat dry with paper towels – a dry surface will help the spices and cornflour adhere evenly onto the fish.”
Jenny’s Styling Tip: “Don’t be afraid to leave a little mess, allow the filling to fall out of your taco. These mishaps are styling gold, remember you want it to look tempting and realistic as possible.”
Ingredients:
1 red onion 1 red pepper
1 little gem lettuce 8gSoy Sauce
6 White Tortilla Wraps 2 Tsp Smoked Paprika
1 Tsp Ground Cumin 1/2 Tsp Cayenne Pepper
5g Coriander 4 Tbsp Cornflour
2 X 100g Basa Fillets 15ml White Wine Vinegar
50ml Mayonnaise
Method:
- Preheat the oven to 200°C/ 180°C (fan)/ 400°F/ Gas 6
- Peel and finely slice the red onion
- Deseed the red pepper (scrape the seeds and pith out with a teaspoon) and cut into thin strips
- Add the sliced red onion and pepper strips to a baking tray, drizzle with olive oil and season with a pinch of salt and pepper
- Put the tray in the oven for 10-15 min or until soft and golden
- While the vegetables are cooking, cut each basa fillet into 6 strips
- Add the basa strips to a bowl, drizzle with the soy sauce and give everything a good mix up
- Add the cornflour, smoked paprika, cayenne pepper (can’t handle the heat? Go easy!) and ground cumin with a pinch of salt to a bowl and stir it all together – this is your spice mix
- Add the basa strips to the bowl and gently turn them until they’re fully coated in the spice mix
- Heat a large, wide-based pan (preferably non-stick) with a drizzle of vegetable oil over a medium-high heat
- Once hot, add the coated basa strips and cook for 2-3 min on each side or until crisp and cooked through – this is your crispy fish – Tip: Your fish is cooked when it turns opaque and flakes easily
- While the basa strips are cooking, add the tortillas to a baking tray
- Put the tray in the oven for 2-3 min or until they’re warmed through
- Chop the coriander finely, including the stalks (save a few whole leaves for garnish!)
- Combine the mayonnaise with the white wine vinegar, the chopped coriander and a generous pinch of salt and pepper – this is your coriander mayo
- Shred the little gem lettuce
- Divide the shredded little gem and cooked peppers & onion between the warmed tortillas
- Top each tortilla with 2 pieces of crispy fish and drizzle with the coriander mayo
- Garnish with the remaining coriander leaves. Enjoy!
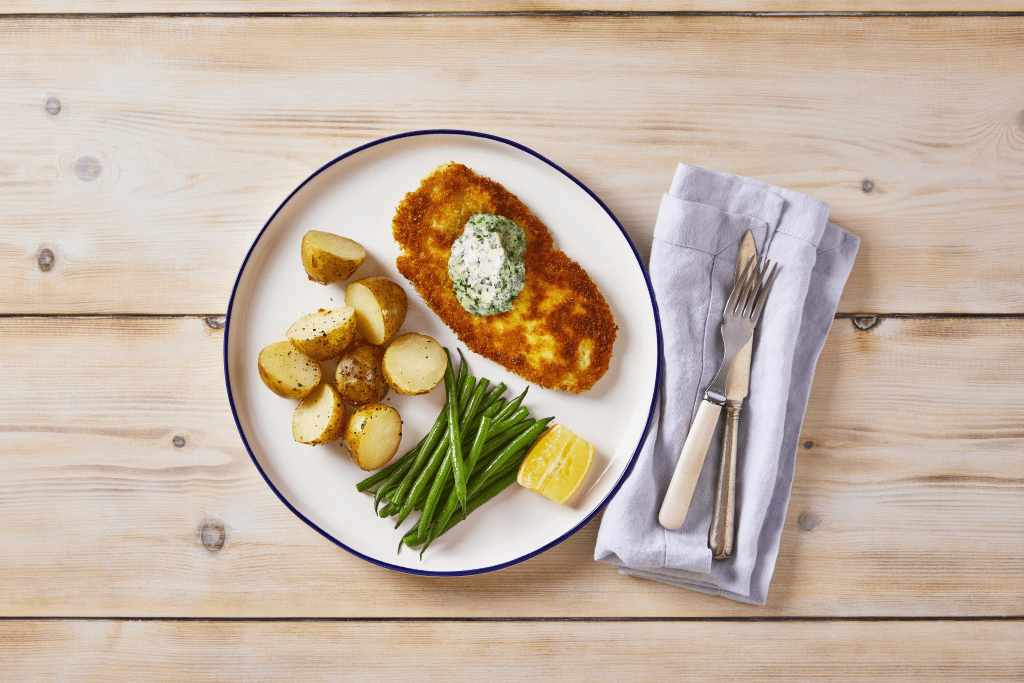
Garlicky Chicken Kiev With Green Beans – Recipe
This easy chicken Kiev recipe is an all-time classic! And it doesn’t take long to prepare, making it the perfect meal for Gousto’s virtual dinner party. Smother your British chicken breasts in breadcrumbs, and pan-fry until golden and crispy – serve with a dollop of rich garlic and herb butter, green beans and potatoes. Delicious!
Jordan’s Tip: “When breading, use one hand for dipping your chicken into the wet ingredients (egg) and the other hand for dry (flour and breadcrumbs) to prevent getting sticky fingers!”
Jenny’s Styling Tip: “Your homemade garlic and parsley butter and crispy chicken are the star of the show so try rotating your plate until they are in an area your eye is naturally drawn to.”
Ingredients:
1 Lemon 1 British Free-Range Egg
1 Garlic Clove 40gCornish Clotted Cream
300g Waxy Potatoes 80g Trimmed Fine Green Beans
5g Parsley 30g Panko Breadcrumbs
2 X 125g British Chicken Breast Fillets
Method:
- Boil a kettle
- Cut the waxy potatoes in half
- Add the chopped potatoes to a pot of plenty of boiled water with a pinch of salt and bring to the boil over a high heat
- Cook for 15 min or until almost fork tender
- Add the chicken breasts to a chopping board and cover with a sheet of cling film
- Bash the chicken breasts with a rolling pin until evenly flattened – these are your chicken escalopes
- Add a handful of flour to a plate with a generous pinch of salt
- Crack the egg into a shallow bowl and beat with a fork
- Add the panko breadcrumbs to another plate
- Coat the chicken escalopes in the flour, tap off the excess, then add them into the beaten egg and finally press them into the breadcrumbs firmly to evenly coat all over – this is your breaded chicken
- Heat a large, wide-based pan (preferably non-stick) with a very generous drizzle of vegetable oil (enough to cover the base of the pan) over a medium heat
- Once hot, add the breaded chicken and cook for 4-5 min on each side or until golden and cooked through (no pink meat!) – these are your crispy chicken escalopes – Tip: Add a drizzle more oil if your pan is looking a little dry!
- Meanwhile, peel and finely chop (or grate) the garlic
- Chop the parsley finely, including the stalks
- Cut the lemon into quarters
- Combine the chopped garlic (don’t like raw garlic? Go easy!), chopped parsley, clotted cream and the juice of 1lemon quarters in a small bowl with a pinch of salt – this is your garlic butter
- Once the potatoes are almost fork tender, add the green beans to the pot and cook for a further 3-4 min or until tender with a bite
- Once done, drain and return them to the pot with a drizzle of olive oil, the juice of 1 lemon quarter and a pinch of salt and pepper and give everything a good mix up
- Serve the crispy chicken escalopes with the green beans and potatoes to the side
- Top the crispy chicken escalopes with the garlic butter and garnish with a lemon wedge. Enjoy!
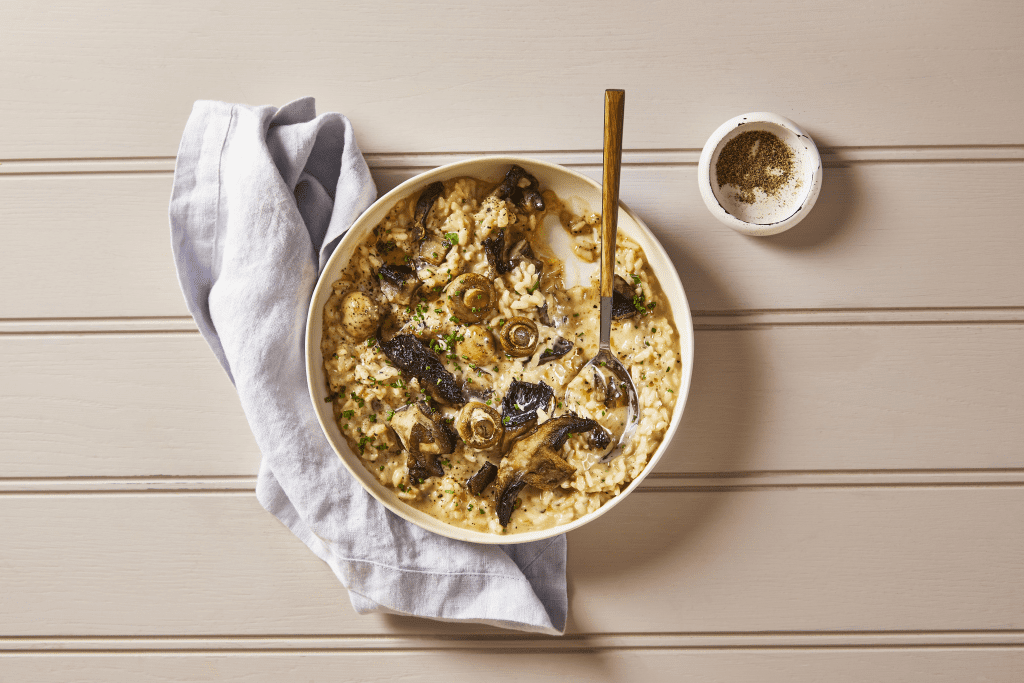
Creamy Two-Mushroom Risotto – Recipe
This classic mushroom risotto ticks all the right boxes, with intense chestnut, and portobello mushrooms and plump arborio rice. You’ll caramelise not one, but two mushroom varieties to add to the creamy risotto, and top off with a sprinkle of chives and a grind of pepper. Mouth wateringly delicious, and the ideal Friday night treat!
Swap out the mushroom suggestion to use up what you have leftover in the fridge, any mushrooms will work well – parsley or basil is a good substitute for chives.
Jordan’s Tip: “Arborio rice is naturally high in starch, but it does need a helping hand to release it. The more you stir, the more starch will be released, leaving you with a naturally creamy risotto!”
Jenny’s Styling Tip: “Capture the perfect risotto shot, by placing your plate in natural lighting – try near a window or in a garden.”
Ingredients:
160g Arborio Rice 1 Garlic Clove
1 Spring Onion 40g Cheddar Cheese
1 Pot Of Cornish Clotted Cream (40g) 1 Knorr Vegetable Stock Cube
1 Chinese Rice Wine (30ml) 160g Chestnut Mushrooms
150g Portobello Mushrooms
Method:
- Preheat the oven to 150°C/140°C (fan) /300°F/Gas 2
- Boil a kettle
- Trim and finely slice the spring onion and chop the chives finely
- Peel and finely chop (or grate) the garlic
- Dissolve the Knorr vegetable stock cube in 700ml boiled water – this is your vegetable stock
- Heat a large, wide-based pan (preferably non-stick) with a drizzle of vegetable oil over a high heat
- Once hot, tear and crumble both the portobello and chestnut mushrooms directly into the pan with a big pinch of salt
- Cook over a high heat for 3-5 min or until starting to brown and caramelise
- Once caramelised, transfer the mushrooms to a baking tray (use tin foil to avoid mess)
- Put it in the oven until step 7 and reserve the pan
- Return the pan to a medium heat and add the sliced spring onion and half of the chopped chives (keep the rest for garnish) with a knob of butter
- Cook for 30 secs or until softened
- Add the arborio rice and chopped garlic to the pan and cook for 30 secs, stirring to coat the grains in the butter
- Add the Chinese rice wine and cook for a further 30 secs or until it’s evaporated
- Add 1/3 of the vegetable stock and stir continuously with a wooden spoon until it has absorbed
- Continue to add the stock, a little at a time, stirring more or less continuously for 20-25 min, until all the stock is absorbed and the rice is cooked – this is your risotto
- Meanwhile, grate the cheddar cheese
- Once cooked, remove the risotto from the heat and stir in the grated cheese, clotted cream and half of the mushrooms (keep the other half for garnish)- Tip: Add a little more boiled water if your risotto is too clumpy – a risotto should have an almost porridge-like consistency
- Season with pepper
- Serve the risotto in bowls and top with the remaining mushrooms, a sprinkle of the remaining chives and a good grind of pepper. Enjoy!
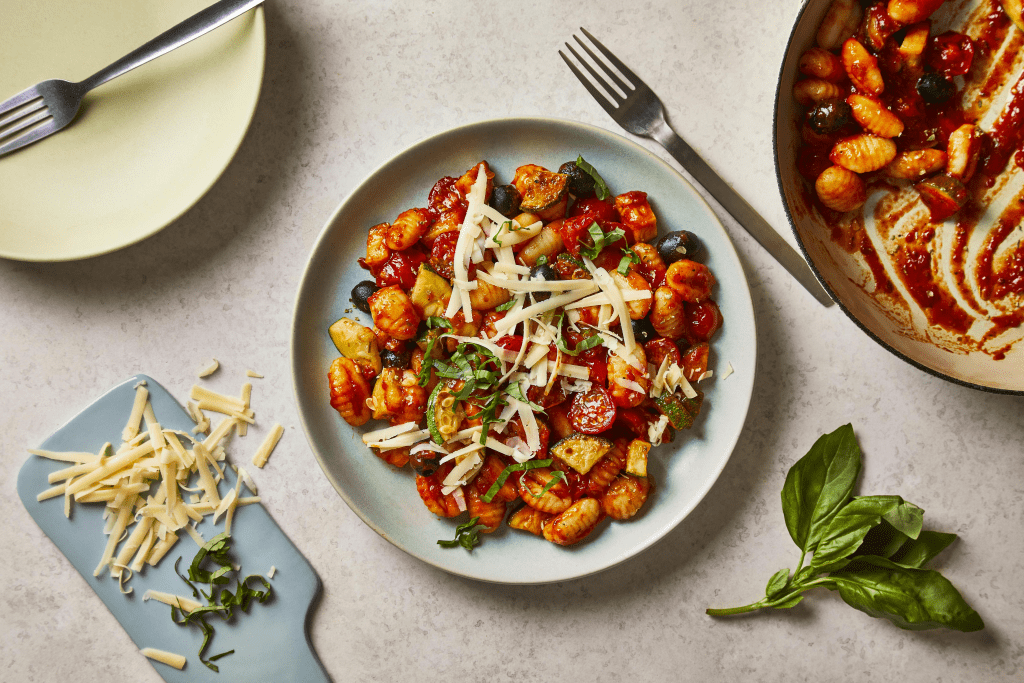
10-Min Mediterranean Veg Gnocchi With Basil – Recipe
Rustle up this Mediterranean inspired gnocchi with courgettes and olives in just 10 minutes. You’ll chop courgette, cherry tomatoes and olives, chuck them in your gnocchi, then sprinkle with basil and cheddar – super simple and super tasty!
For a vegan alternative swap out your cheddar cheese for nutritional yeast or vegan cheese. Or make your meal coeliac-friendly by swapping your gnocchi for a Gluten-free alternative.
Jordan’s Tip: “If your sauce is starting to look a little dry, add a splash of the reserved starchy gnocchi water to the mix.”
Jenny’s Styling Tip: “Filling your plate with too much gnocchi will look messy, keep it simple. Place a small portion in the center, and add the remaining elements on top to finish the dish; you can always go back for seconds!
Also – don’t forget your garnish! the pop of green here contrasts against bright red tomato sauce and makes your dish look more appetising”
Ingredients:
10g Basil 60g Pitted Black Olives
1 Courgette 40g Cheddar Cheese
125g Cherry Tomatoes 1 Tsp Dried Oregano
200g Tomato Frito 350g Gnocchi
15g Roasted Garlic Paste
Method:
- Boil a kettle, then heat a large, wide-based pan (preferably non-stick), with a generous drizzle of vegetable oil over a high heat
- Cut the courgette into quarters lengthways then slice finely
- Once the pan is hot, add the sliced courgettes with a pinch of salt and cook, covered, for 1-2 min or until starting to soften
- Chop the cherry tomatoes in half
- Once the courgettes are starting to soften, add the roasted garlic paste, dried oregano and the halved cherry tomatoes
- Cook for a further 2-3 min or until fragrant
- Meanwhile, add the gnocchi to a pot of boiled water with a large pinch of salt and bring to the boil over a high heat
- Cook the gnocchi for 3 min or until it begins to rise to the top of the pot
- Once done, drain the gnocchi and reserve a cup of the starchy cooking water
- Once the vegetables are fragrant, add the tomato frito and black olives with a generous pinch of black pepper and give everything a good mix up
- Cook for 1-2 min or until the olives are warmed through
- Chop the basil finely, including the stalks
- Grate the cheddar cheese
- Stir the drained gnocchi through the sauce and season to taste with a pinch of salt – this is your Mediterranean veg gnocchi
- Serve the Mediterranean veg gnocchi and garnish with the chopped basil and grated cheddar
- Enjoy!
Jenny has also provided us with some extra food styling tricks to make your dinner party creations look extra delicious, whatever you’re rustling up in the kitchen.
Food-Styling 101: Pro Tips To Level-Up Your Lockdown Cooking
Take your foodie photos in natural lighting. It’s all about lighting, when getting that perfect dinner shot – try placing your plate down next to a window, and never use your build in flash. Natural lighting shows all the delicious details, and highlights the vibrant colours of your dish.
Don’t overcrowd your plate. Piling your plate up will look messy, keep it simple! Find a focus point on the plate and add ingredients around to complement. Looking a little basic? Have a change of scenery and introduce your dish to a jazzy table cloth or tea towel to balance the shot.
Pick the perfect plate. From size to colour, your plate should complement your food – choose a high contrasting colour like white for your colourful dishes. And pick matte over glossy, we want to avoid a shiny surface.
Experiment with layers and height. Transform a basic dish by introducing different levels and layout of food. Try stacking different elements of your dish, to create that wow factor!
Surround your dish with complimentary props. If your dish is looking a little lonely, try placing related ingredients and cooking utensils around the plate such as herbs, jars, tins and cutlery. Reveal the tools and ingredients of your dish, to set the scene and reveal how you achieved your tasty meal.
Have a play around with angles. Achieve that dinner party shot by moving around the plate and taking a variety of different images – this way you can see which angle your dish looks the best from. Every dish will have a preferable angle.
Be prepared. Although you want to achieve that perfect shot, eating it is far more important – don’t let your dinner go to waste, always have props, table setting and lighting set up in advance. Keep your herbs in cold water, to keep them fresh before the final shot!
Don’t forget the garnish. A sprinkle of chives or a pinch of parsley can add life to a dish. The finishing touches will transform your meal into a virtual dinner party-worthy plate. Make a little mess to show how raw and real your dish is!
Presentation is key. Mop up any spillages with kitchen paper – just like restaurant chefs, wipe around the edge of your plate for final touch-ups. And finish off with a drizzle of olive oil to keep things looking glossy.
Join Nick Grimshaw and three dream celebrity dinner guests at Gousto’s Table for 1 Million on Friday 22nd May at 8pm. www.tablefor1million.com @goustocooking #Tablefor1Million
All credit too: https://www.tablefor1million.com/

| [donate]
| Help keep news FREE for our readersSupporting your local community newspaper/online news outlet is crucial now more than ever. If you believe in independent journalism,then consider making a valuable contribution by making a one-time or monthly donation. We operate in rural areas where providing unbiased news can be challenging. |


